Archive for the ‘Home Automation’ Category

Wall mount tablet progress

So this may look super messy, well that’s because it is… However it is progress!

Tablet is finally mounted and charging off USB (Squeeeeee) The good thing about this particular mount is that my ipad and touchpad both fit.

Currently pictured is the touchpad running android CM10 and Linuxmce Orbiter.

IMG_6909

IP Camera Hardware List

Below is a list of components required to achieve a homegrown dual USB to IP camera. (Hope that made sense) 😛
For my setup I have the following Hardware;

1) Seagate Dockstar
2) CA-42 Nokia Cable
3) 2 x Logitech C910’s
4) Trendnet TPE-112GS
5) Old Outside CCTV Camera Domes
6) Relevant tools to dismantle the Dockstar and Cameras.

At home I use a POE switch so I try to power everything I can off this.  The Dockstar itself takes 12VDC so i tested the current draw of the unit with both cameras running and it came well under 1AMP, therefore when the 48VDC POE provides is step down to 12VDC I had plenty of current to play with.  Initially I tested with a 100mbit Step down adapter however I had duplexing issue with the network interface on the Dockstar and I couldn’t seem to change these settings.  I have since purchased a Gigabit version to use.  The CA-42 cable is utilised to get serial connectivity to the Dockstar, a really good guide on adding a serial header to the device can be found here : http://www.yourwarrantyisvoid.com/2010/07/21/seagate-dockstar-add-an-accessible-serial-port/ Highly recommended read.  As a result I wont go into this unless I get time 😛

Well that’s about it for the core hardware components of this project, if I have missed anything I will be sure to add it as I go with the guide.


Home made IP Camera Checklist

I thought I would start writing up a check-list for my IP Camera howto.
With the help from a friend of mine (Hewball) and various other people throughout forums and what not (Assisp) oh and various guides on how to install OpenWRT in a Seagate Dockstar specifically this guide : http://wiki.openwrt.org/toh/seagate/dockstar I have managed to be able to run 2 x Logitech C910’s off a Dockstart via a POE step down convertor.  This blog post is a check list of what things I need to cover in order to replicate doing it again.

1) Hardware List
2) Installing Openwrt on the Dockstar
3) Kernel Patches to apply to uvcvideo.h
4) Scripts to start cameras on boot/hotplug
5) Modifications to Cameras to suit outside conditions
6) Future additions

Well I hope that covers it all, the next post will cover all hardware that I used to get the particular set up I was after.


Unable to remove a Z-wave pairing??

Hey All,

It has been a long time since I have posted and a lot has happened, both with the Home Automation, Work and the Brewing…. Where do I begin???
I know, I shall begin with the Z-Wave Stuff. So far out of the 6 Z-wave in-wall devices I have purchased 2 have been faulty. They have since been replaced (mad props to www.smarthome.com.au). With one of the faulty Z-Wave devices I had I managed to add it to the controller, but could not control it, nor could I remove the pairing. This was a huge pain in the back side as there is no implementation in LinuxMCE to force remove a paired device from the USB Sticks Database.  So what happens in a situation like this? You have to remove and pair everything up again, that’s fine if you only have a few devices but not fine if you have 30+. 🙁  No problem I found a windows program posted on a forum (can’t remember where but most likely the Linuxmce Forum) that can permanently remove paired devices in the even they are faulty and can’t be unpaired gracefully..


That program is here.


More Z-wave Kit

Ok, I have blogged about Z-wave a wee bit, but I haven’t actually posted any pics. I recently received some more Z-wave gear (in exchange for a Z-wave universal remote I sent back as it wouldn’t bloody pair with the USB Stick), the gear I received was 2 x In-Wall Appliances and 1 x Minimote.  It took a while to get the minimote to pair with the USB stick, but once I figured it out I can now use the minimote as an inclusion device.  This means that I can walk around to newly installed Z-Wave gear push the pair button on the device and the inclusion button on the remote and it will send all pairing information to the USB Stick, which LinuxMCE will then pick up and start off the wizard… It’s just that easy…

So no I have my minimote configured to add devices and to control certain lighting scenes in my house, at this stage it only handles the Kitchen light on one scene and the dining and lounge on another.  I am thinking that a few more minimotes might be worth while for different parts of the house and for different scenes, but we shall see…

The 2 x In-Wall appliance modules are to replace my Dimming modules as they seem to not work to well with the LED downlights have.  I believe this is due to the lead/trailing edge dimming. Search wikipedia if you want to know more about how dimming works. 😛

Here are some poor iphone quality photos!

Z-wave partial install

Ok, so just a quick update with my Z-Wave installation.  I currently have 2 x In-wall appliances and 2 x In-wall dimmers installed. I also have 1 x Dimmer and 1 x Appliance (external devices).  The in-walls have been installed in the Home Theatre (Dimmer), Kitchen (Dimmer), Lounge (on/off) and Dining (on/off).  The on/off appliance modules work flawlessly however the dimmers do not.  They randomly flicker and seem to turn off after a short period of time if they are dimmed.  If you are lucky and they don’t flicker when turning them on, if you get them to full power they stay on.  I am using the Crompton KLED12A XL-LED. The reason that these are not functioning properly could be to do with the way the transformers for the downlights handle the dimming (yes they are dimmable trannies). From what I have read (and I could be wrong. NO I am probably wrong here :P) the  KLED12A requires trailing edge dimming (where the trailing part of the wave form is cut rather than the leading) but I believe the aeon-labs (smarthome.com.au) in-wall dimmers dim on the trailing edge.

I have logged a ticket with smarthome.com.au to see if they experience this problem with dimmable LEDs but have yet to get a response. If anyone out there knows why I would love to hear from you.

I have also returned my Z-wave remote (weeks ago), But I nor have I had a response about this or a replacement sent out….

Well that’s my rant for tonight, when the downlights go all crazy I will be sure to take a vid of it.

Cheap IP Camera where art thou?

Why is it so hard to find a cheap IP Camera that has all the features you want….
It isn’t a problem to find one that has good resolution and is vandal proof, but 99.9% of all cheap cameras require ActiveX…. WHY DAMMIT WHY!?!?!?!

That said I have found a camera (that is cheap and nasty) it does require ActiveX however has an extra URL for “mobile devices” this thankfully has let me integrate it with Linuxmce, there is no PTZ functionality with this particular Camera, but it is enough to let me have a play with it.

Next I will look at purchasing a better quality camera to have a play with, either an Axis or a Mobotix (if I can find one that is good value) 😛

Home Theatre… in progress…

So about a month back i got some of my holidays paid out. I was going to use this to do the paving around my house but unfortunately I went and visited a friend of mine who works at West Coast Hifi and ended up walking out with an Epson EH-TW3500…. WHOOPS! Oh well no matter the very first room of my house was reserved for a Home Theatre so it was time to now set this puppy up! In went the projector but I need some better front speakers (my surround speakers are still very good so I kept them). I went back and saw my mate again and purchased a set of ATS-5s . These are sensational speakers and compliment the rest of my set up nicely… The next on my list was the purchase of a new Receiver however the one I want wasn’t released in AUS until just last week. (Pioneer VSX-LX53)

After setting all this up another friend graciously lent me his old Onkyo, it suffered from heat issues causing the HDMI to cut out intermittently but it helped me in setting up the layout of my speakers and to test drive it with a couple of blu-ray movies. *yay*  Then a couple of days ago I get a call from my mate saying that the LX53’s are now available so naturally I bought one. I was apparently the first person in Perth to get one.  That is it was the first unit sold by Pioneer Australia.

After spending all weekend setting this up I ran into a few problems with HDMI out over Cat6 Baluns.  Firstly I am using Baluns that do not require power, they worked fine connected directly to say my PS3 or laptop and they worked fine connected to the Onkyo until it started suffering from heat exhaustion.  I just couldn’t understand why….
So I took another trip to West Coast Hifi, grabbed a set of powered Baluns (the really annoying thing about these is that they require power on the projector side). Anyway I plugged it in and still no joy.  I am assuming the problem is related to some handshaking between the projector and the Receiver.  Given that this didn’t work I had another friend pop over with a HDMI 2-way splitter. This also requires power but on the receiver (oputput) side.  So we replaced the powered Baluns with my original ones, plugged in the splitter and voila we have HDMI outputting correctly!! With this in mind we headed down to Jaycar and picked up a HDMI repeater/extender to see if this would work.  But unfortunately it did not.  So currently I am borrowing the 2-way splitter and it has been working fine.  Doing a bit of research and there are powered Cat6 Baluns that take power on the output side so I am interested in trying some of these. (Jaycar sell em) but at $110 a pop I don’t really want to be throwing money at a solution that may not work.  Sure I could keep the 2-way splitter in but I would prefer to have something smaller/more concealable.

Anyways the Home Theatre is progressing nicely, all that is left is to get a HTPC, connect the projector and Receiver up via serial and write some GSD for Linuxmce to control them.  Once this is done I will install some motorised draps and some Z-wave lighting and the Home Theatre room will be fully automated. 😛

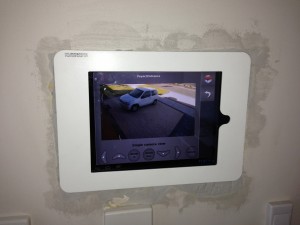
Here are some pics taken of the setup thus far.  Please excuse the quality as they were taking rather quickly and with the iPhone….

Z-wave in Australia!

Z-wave is finally in Australia! A couple of weeks ago, my pre-order of some Z-Wave kit finally arrived. After a quick test of the external appliance modules I can safely say the response is 1000x faster than that of X10! Whats more when I paired the devices up with the Z-Wave USB stick and whacked it into my LinuxMCE core up popped the pnp wizard I answered a few questions as to where the devices lived in my house and then it just worked! Mad props to the guys who wrote the Z-wave implementation with LinuxMCE. Out of all the stuff I have played with this is by far the best integrated (IMO) with LinuxMCE.

Once I have a bit more cash I will be purchasing some more but at just under $100 a module it can get a little pricey!

I will post some pics soon of the Modules and a vid of its operation in LinuxMCE.

LinuxMCE and Touch Orbiter

I have been playing with LinuxMCE a fair bit in my new house, it does have its limitations as far as video playback is concerned but that is just one of the many things it can do. People often mistake it for a HTPC when in fact is much more.
The devs over at LinuxMCE have done some really impressive things. Touch Orbiter for one. I think this was a huge step forward and allows almost any device become an Orbiter, because of this I went and purchased a mini2440 with a 7″ touch screen (http://www.friendlyarm.net/products/mini2440) I was hoping at porting over the Touch Orbiter to this, but as it turns out someone already had. It still needs a little bit of work (like turning the LED backlight off after a period of time etc). But apart from that it seems to work really really well.

I am in the process of writing up a guide to build an embedded linux OS for the mini2440. While there are so many guides out there I did find that none were exactly what I need, that said they did help me a lot but I think it would be best for me to write a guide up specific to installing the Touch Orbiter on it. Once this is done I will post it here.

Return top